Using Macro to brute force anti-CSRF token-based forms
In the last few articles, I shared different burp suite extensions which can make your web testing easy and faster. Today in this article I would like to introduce you to an awesome feature of burp suite called Macro which can help you in performing some complex tasks in web application pen-testing.
Burp suite is one of the top tools for web application testing. However, controls such as CSRF tokens often fail these automated tools. For example, we cannot brute force a phpMyAdmin login page or even DVWA login page directly using the Burp intruder as they have something called an anti-CSRF token that keeps changing. But is it impossible to use tools like Burp Repeater, Intruder etc. if the page has an anti-CRSF token? The answer is no. It is still possible to perform brute force or any other automated testing even though there is an anti-CSRF token on the page.
In this article, we will see how we can bypass these controls so that we can perform tests like brute force in these kinds of login forms easily.
Using Burp Macro to update anti-CSRF token
For this demo we will use DVWA:
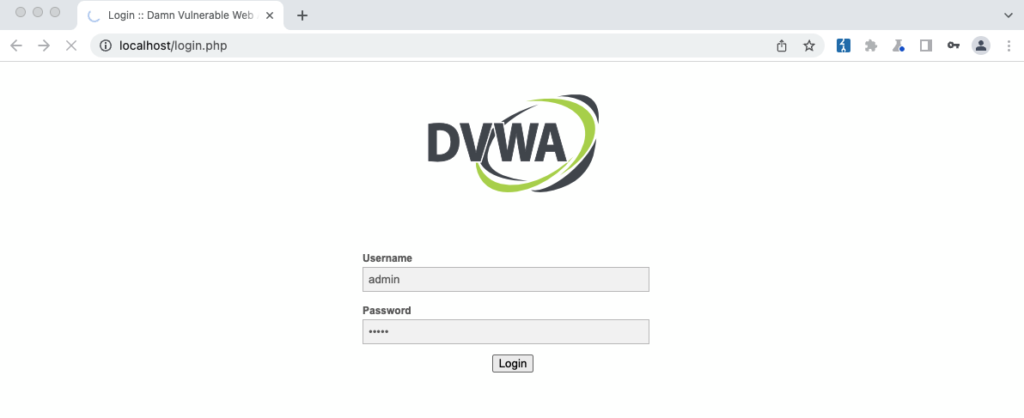
This is the login page of DVWA and if we see the request in Burp suite we can see that it adds an anti-CSRF token called user_token in the request so if we send it to intruder and try to brute force, it will fail as the token is not getting updated.
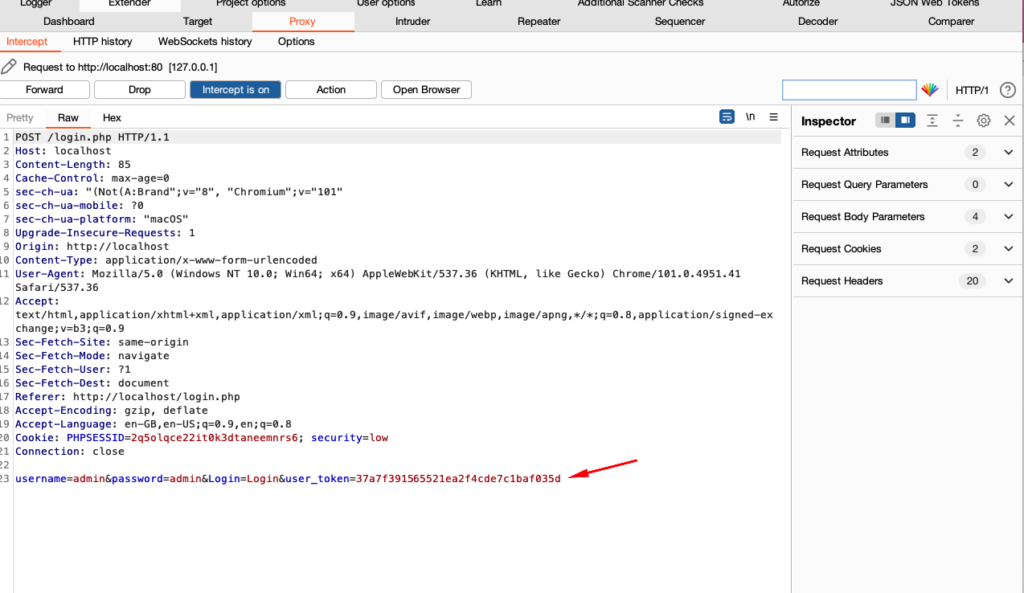
Using macro to update the user_token
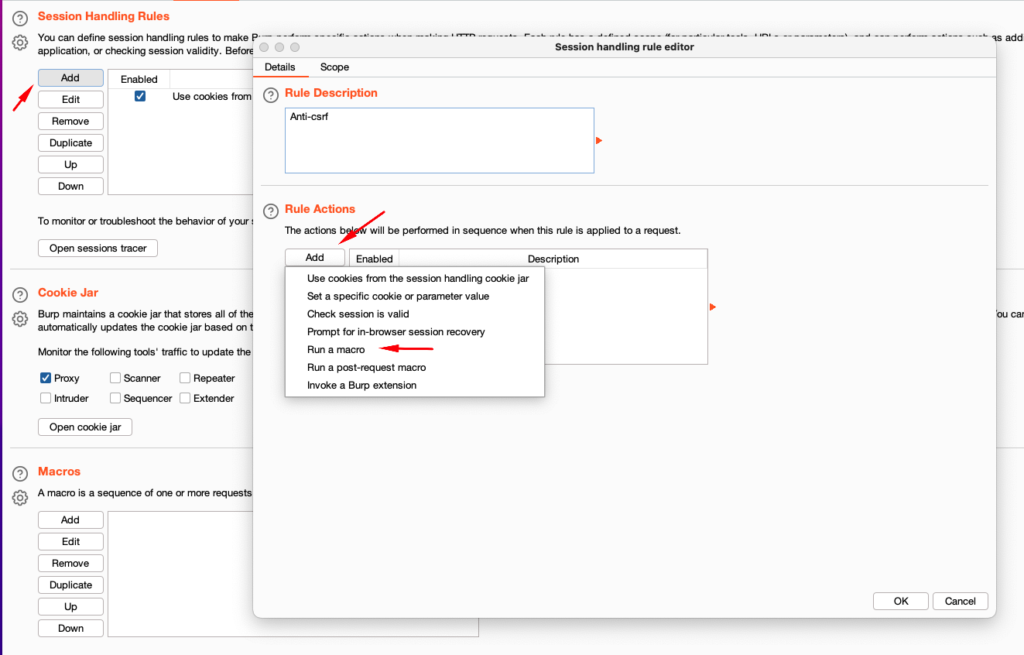
- Click on project options and then click on Sessions

2. Under session handling rules click on add. A new popup window will appear now in the popup window under the Rule actions click on the add button and then click on “Run a macro”:
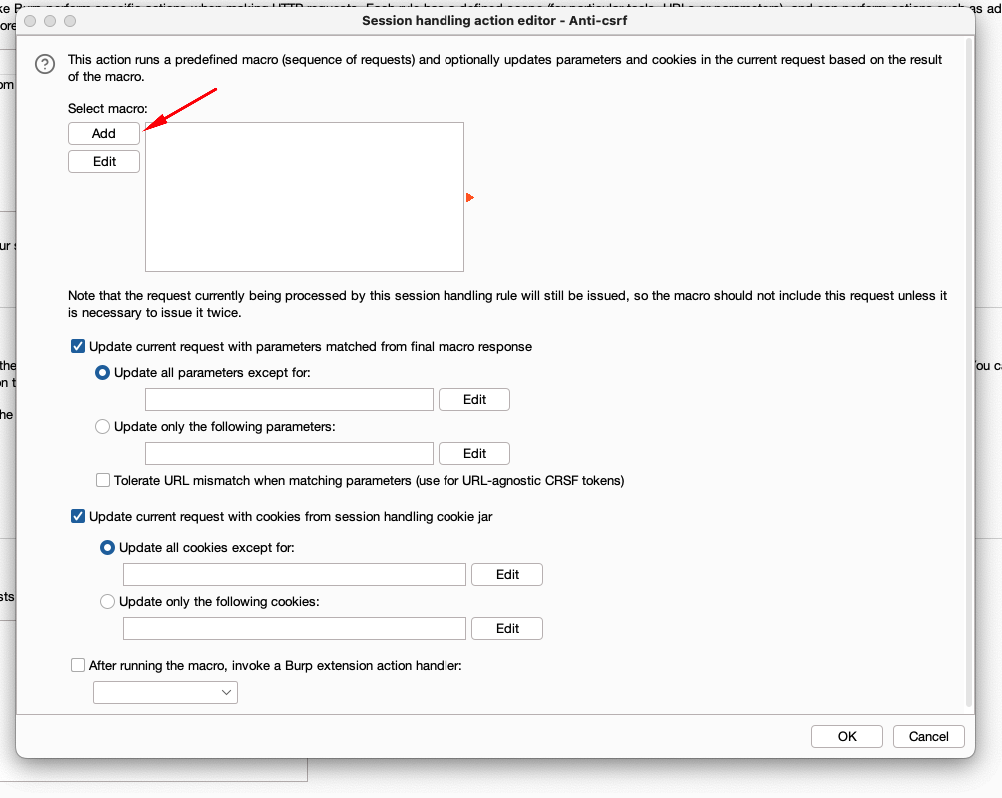
3. After clicking on the run a macro option another new window “session handling action editor” opens up. Click on the add button:
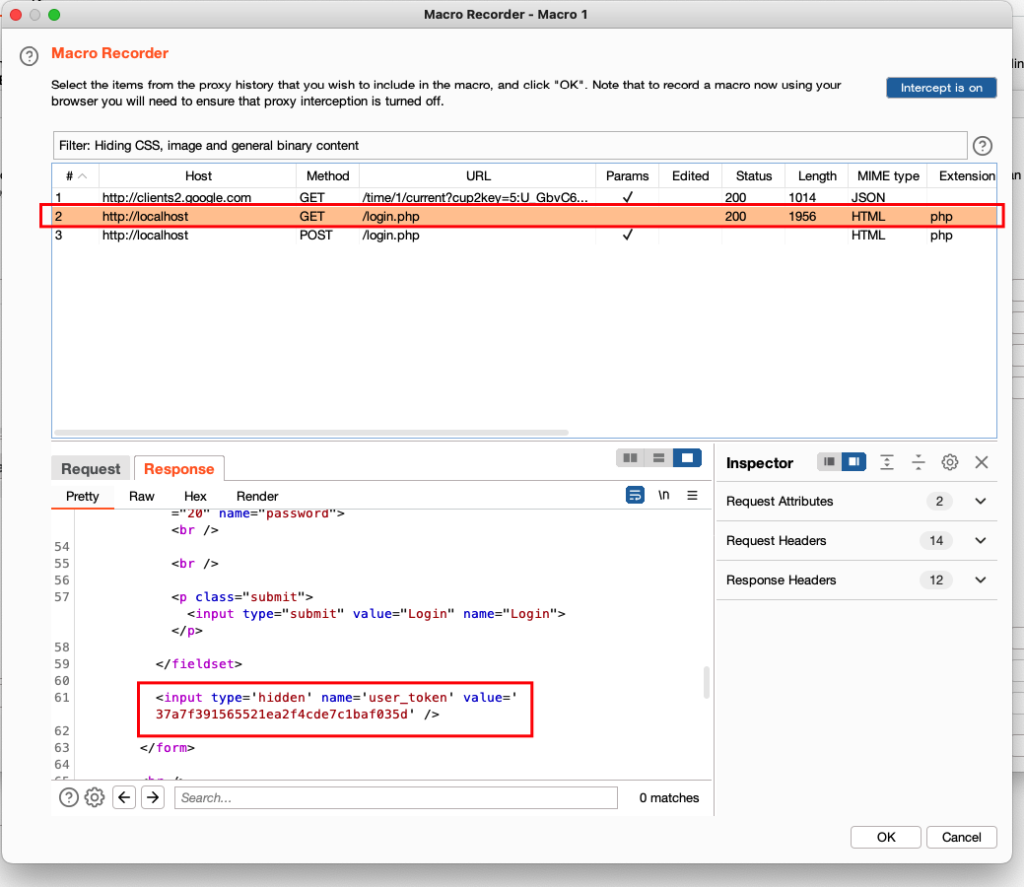
- Clicking on the add button opens up the Macro recorder window where it shows us the request.
In this case, we will select the GET request just before the login POST request and click ok. This is because we got the anti-CSRF token in the response to the GET request:
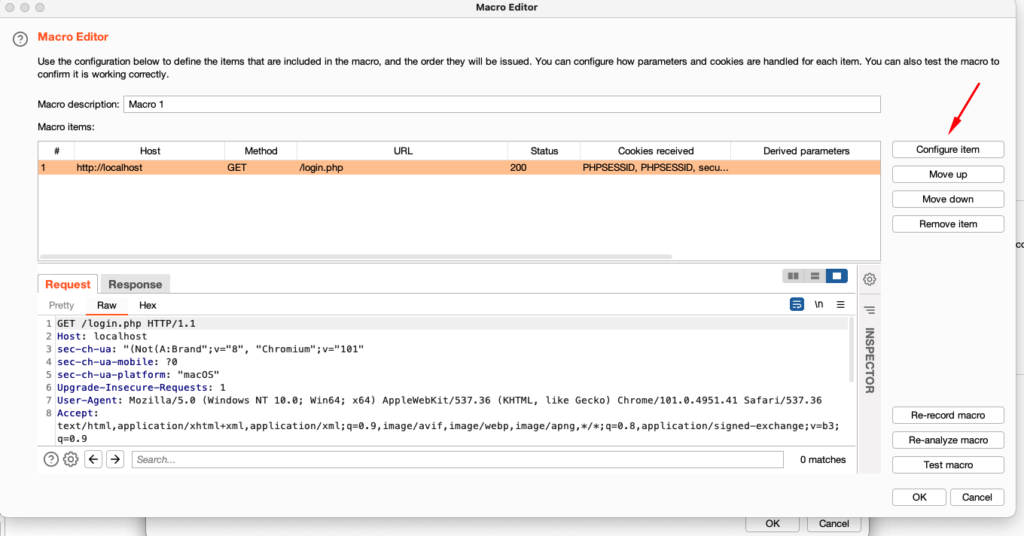
5. After clicking ok another window called Macro editor will open. Now we need to configure the macro and instruct it on what it exactly needs to do. For this click on the Configure Item button:
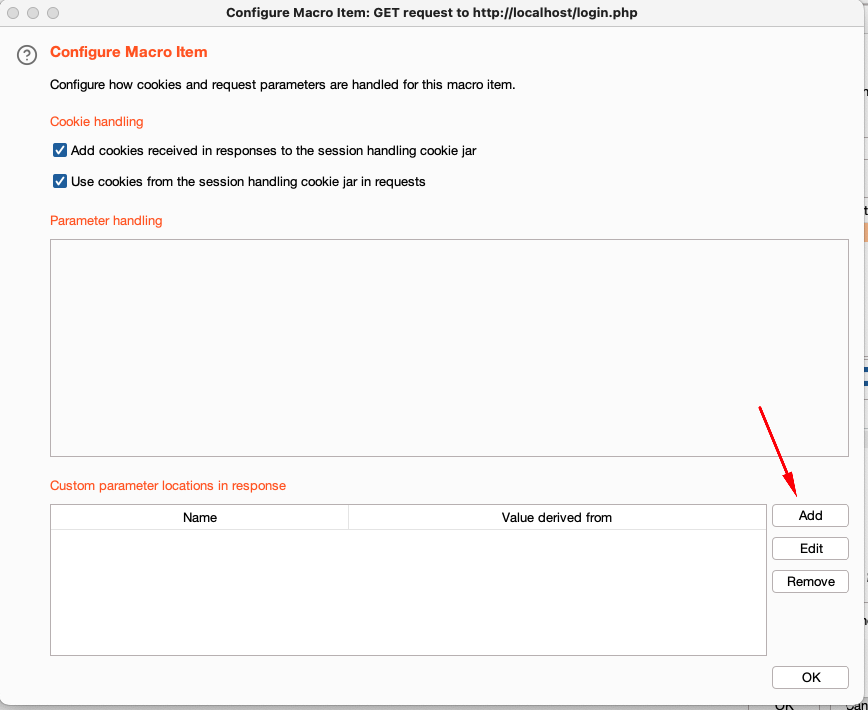
6. After clicking on Configure Item a new window opens where we need to define custom parameter locations in response. To do that click on the add button:
- Now we need to select the user_token by giving the parameter name, start after expression, end.
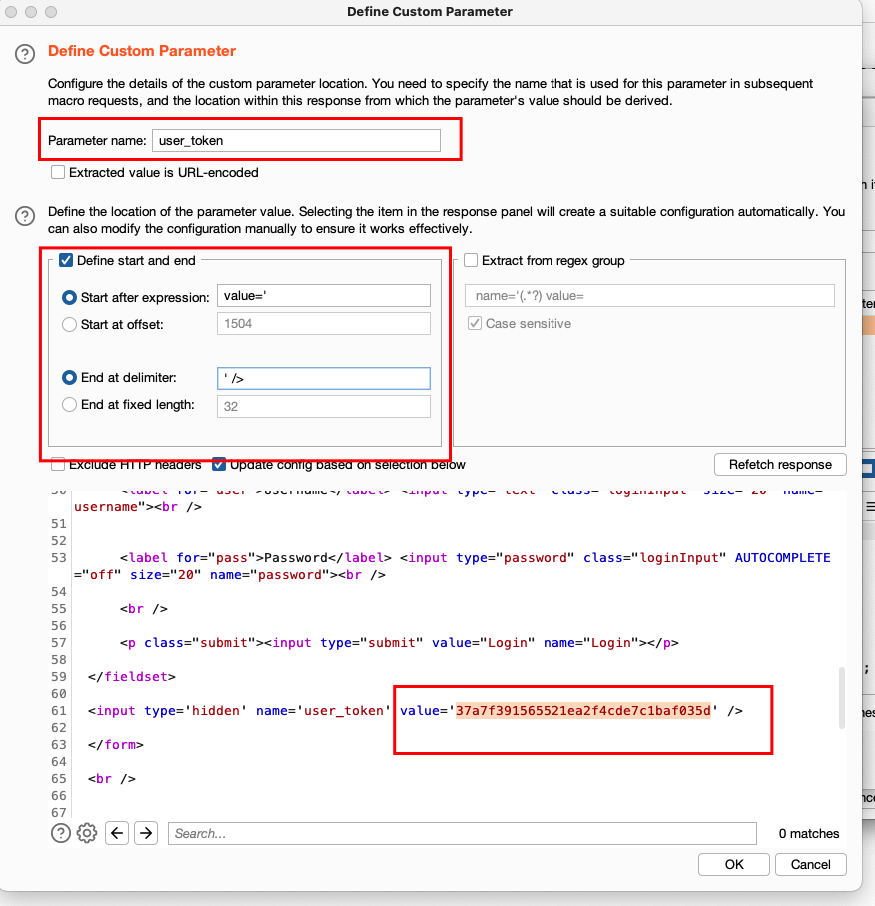
Make sure that you enter the details correctly. If the details are entered correctly then it will automatically highlight the value. And click ok. If it automatically highlights the value, then it means that everything is correct so far.
- After doing till 7th step, you will get the session handling editor window again. Now click on the Scope tab and define your scope:
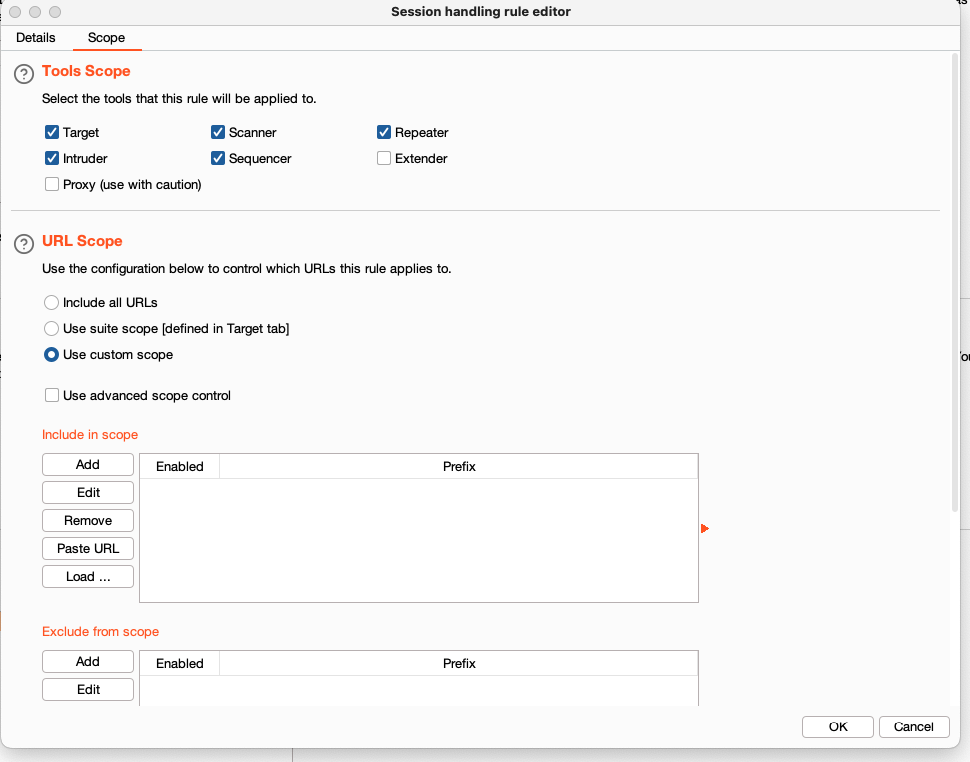
You can edit the URL scope, select the tool where this rule will be applied, etc.
Now send the request to the repeater or intruder to test for brute force or other vulnerabilities. In this example, I’ll send it to repeater.
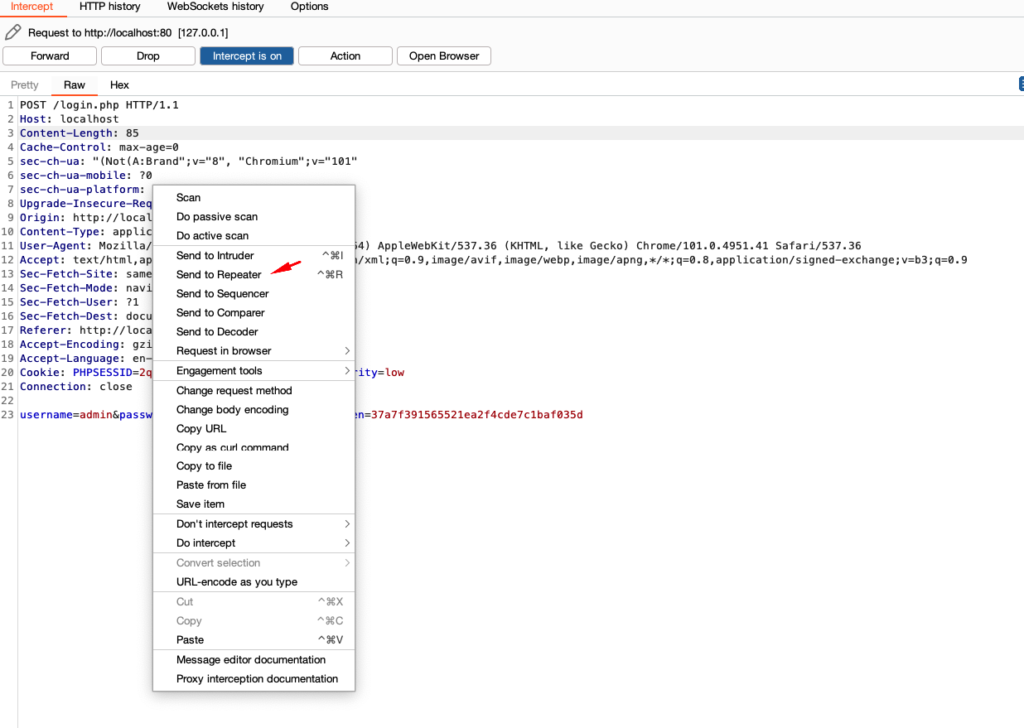
After sending it to repeater we can see that the user_token will magically keep changing on every request. Here in this request, the value of user_token is 7ff1ac8d69daa9d3d0c4f64fcca1a57f and after the send button is clicked the value changed to ec71dbf8372fe07c4c1c3d9b801a0d14
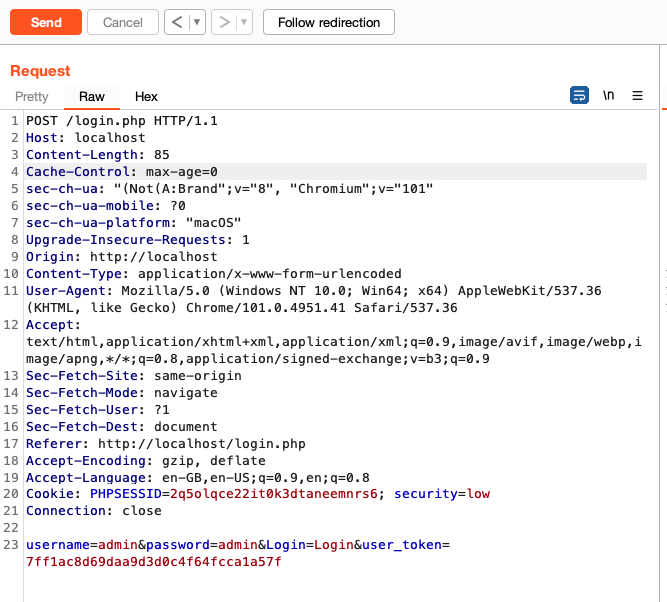
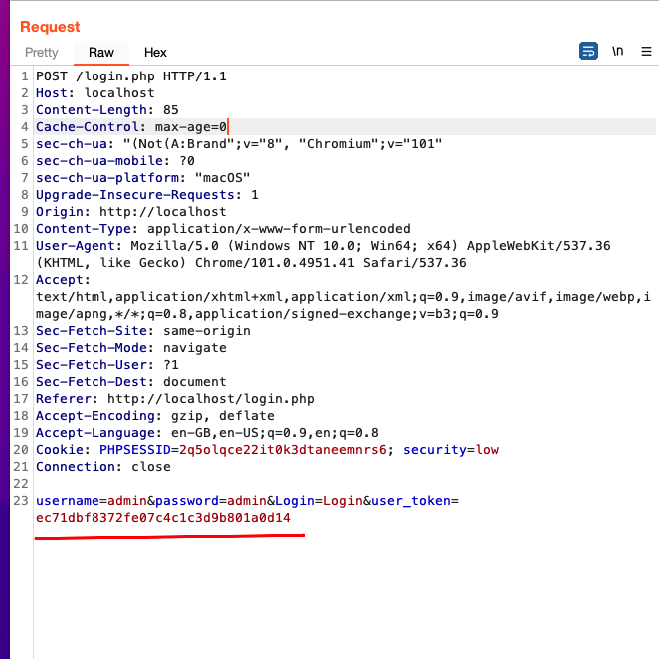
This will help in performing attacks like brute force or testing for any other vulnerability without the application showing any error.
This is just a simple example of how to bypass the anti-CSRF token using Burp suite. In this example the token is taken from the response of the previous request. Sometimes tokens are taken from other websites. There are few other applications where this is done in a much more complex way. But now you have the idea of how Burp macro works, so you can easily try to automate few steps and perform your testing easily.


