
Post credit: Glen D. Singh
A honeypot is a security system that is deployed on a network to monitor security intrusions from hackers or other threat actors. The honeypot is usually a single computer or server which simulates a real production system to trick hackers into believing it’s a real system within the organization. Security professionals use honeypots to monitor the activities of threat actors to better understand their intentions, techniques used to compromise systems and gather intelligence to improve the overall security posture.
A honeypot is usually deployed on a single machine, sometimes an organization with sufficient resources would deploy an entire network with honeypots, also referred to as a honeynet. A honeynet can easily trick a threat actor into believing they are targeting a real production network.
In this article, you will learn how to deploy an open-source honeypot application on AWS. You will also learn how to spin up a virtual machine and set up basic firewall rules to allow the honeypot to monitor traffic flowing across the network and detect cyber-attacks and threats.
Few pre-requisites before you get started:
- Ensure you have an AWS account.
- You will need to install PuTTY, a free terminal emulator application. To get PuTTY, go to https://www.putty.org/ where you will be able to download the version for your operating system.
Getting Started
1. Go to https://aws.amazon.com/ and log in to the AWS Management Console.
2. Next, on the AWS Management Console click on “Launch a virtual machine” to start creating a virtual machine on the AWS cloud platform.
3. Next, on the Amazon Machine Image (AMI) selection page, search for “Debian” to filter Debian 10 Linux, then click Select:

4. Now, you will be directed to the Instance Type page where you will be required to choose computing resources such as CPU and RAM for your virtual machine (we have selected 4 CPU and 16 GB RAM), then click on 4. Add Storage as shown below:

5. On the Storage page, adjust the storage size to 140 GB as the size of the disk and click on 6. Configure Security Group:

6. On the Configure Security Group page, ensure it’s a new security group and assign a name to the group. Then, ensure the protocol type is SSH and TCP using port 22, and the Source is My IP (your public IP address) and click Review and Launch:

7. Now, you will be required to create a new key pair to establish an SSH session between your computer and the new virtual machine on AWS. Choose the option to create a new key pair, set a name, and click Download Key Pair and Launch Instance as shown below:

Note: Ensure you store the key pair in a safe place as it is used to connect to the virtual machine on AWS.
8. Simply click on the instance ID to get more details about the virtual machine:

The following snippet shows a summary of the running instance:

9. Click on the Instance ID once more to get details about the running instance such as its assigned public IP address and public DNS name:

10. On your Windows system, click on the Windows icon on the bottom-left corner and search for the PuTTYgen application as shown below:

11. When PuTTYgen opens, click on Load and select the pair key file which you downloaded earlier.
12. When the key pair file is loaded into PuTTYgen, set a key passphrase to improve the layer of security during authentication, then save private key in a safe place:

13. Now, open PuTTY, set the public IP address or the public DNS of the virtual machine, then click Connection > SSH > Auth as shown below:

14. On the Auth window, click browse and select the key pair that was converted using PuTTYgen, then click Open to connect to the Debian 10 virtual machine on AWS:

15. When you’re connected, the user is admin and the passphrase is the key you assigned when converting the private key using PuTTYgen:

16. Next, use the following commands to update the Linux virtual machine and install Git:
admin@ip-172-31-20-45:~
nbsp;sudo apt update
admin@ip-172-31-20-45:~$ sudo apt upgrade
admin@ip-172-31-20-45:~$ sudo apt install git
17. Next, use the following commands to clone the GitHub repository of T-Pot, a free and open source honeypot platform:
admin@ip-172-31-20-45:~
nbsp;git clone https://github.com/telekom-security/tpotce
18. Next, use the following commands to change your working directory:
admin@ip-172-31-20-45:~
nbsp;cd tpotce/iso/installer/
The following snippet shows there’s an installer script within the present directory:

19. Next, use the following commands to install T-Pot on your virtual machine:
admin@ip-172-31-20-45:~/tpotce/iso/installer
nbsp;sudo ./install.sh –type=user
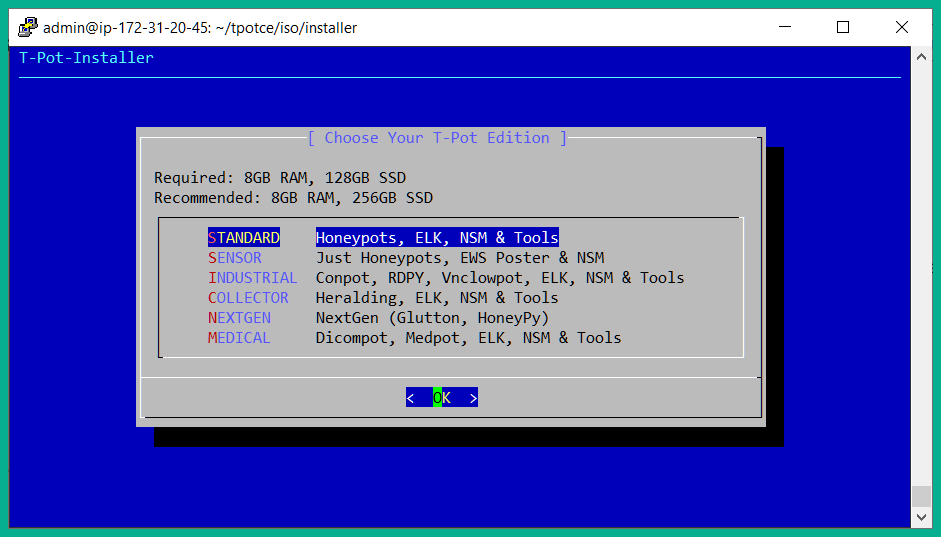
20. The following window will appear, select STANDARD and hit Enter:
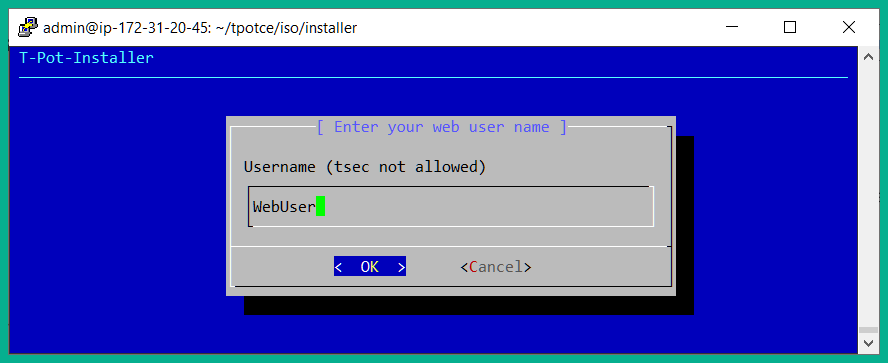
21. Next, set a web user name and hit Enter:
22. You will need to confirm the username is accurate and hit Enter to continue.
23. Configure a password for the username and hit Enter to continue.

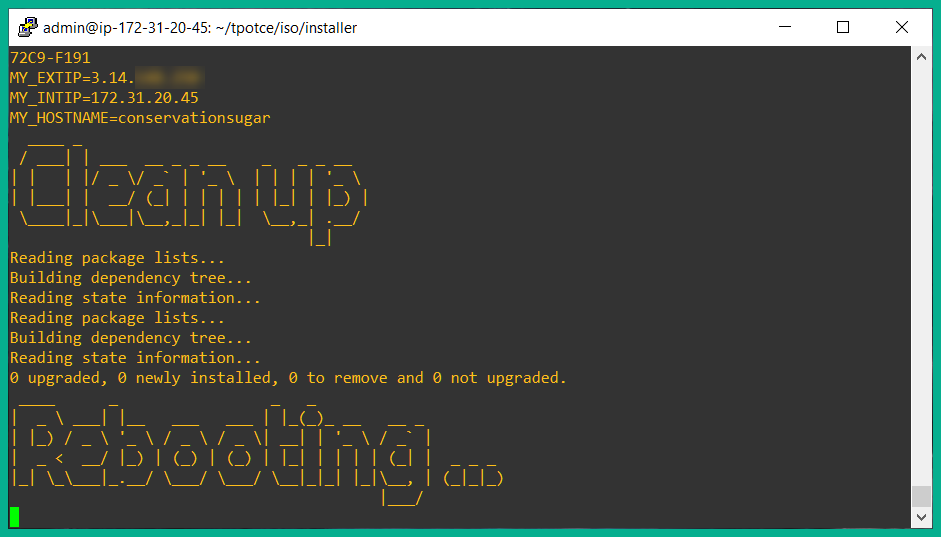
24. A final confirmation window will appear, simply hit Enter or Y to continue the installation:

Once the installation is completed the system will reboot automatically:
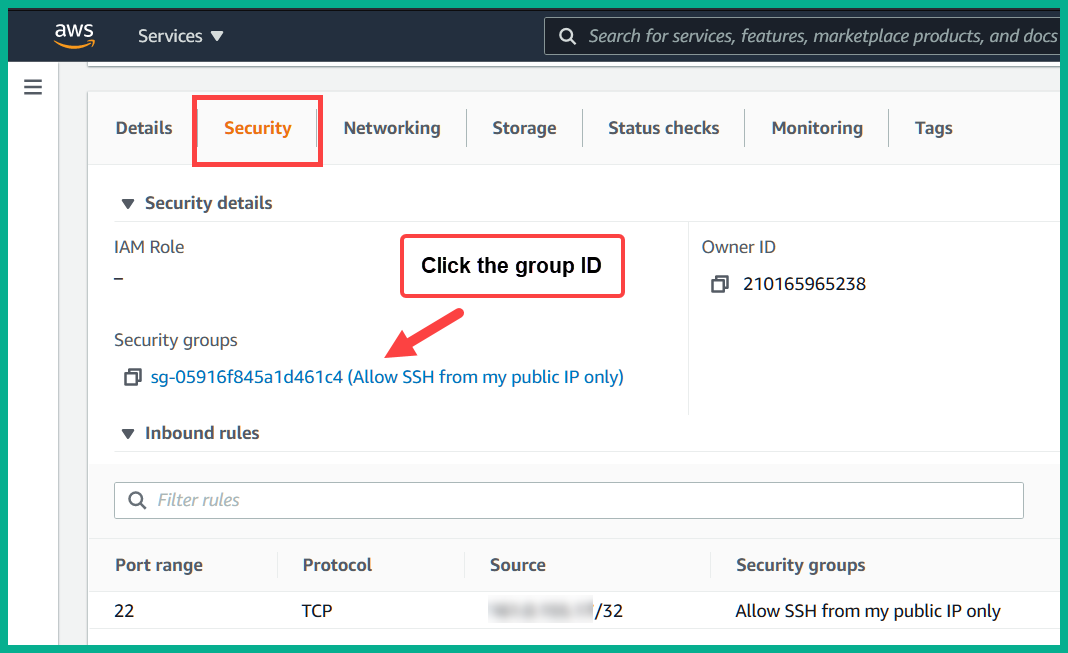
25. Head on over to your AWS instance page for the virtual machine, scroll down to select Security and click on the Security Group:
26. On the Security Group page, click on Edit inbound rules:
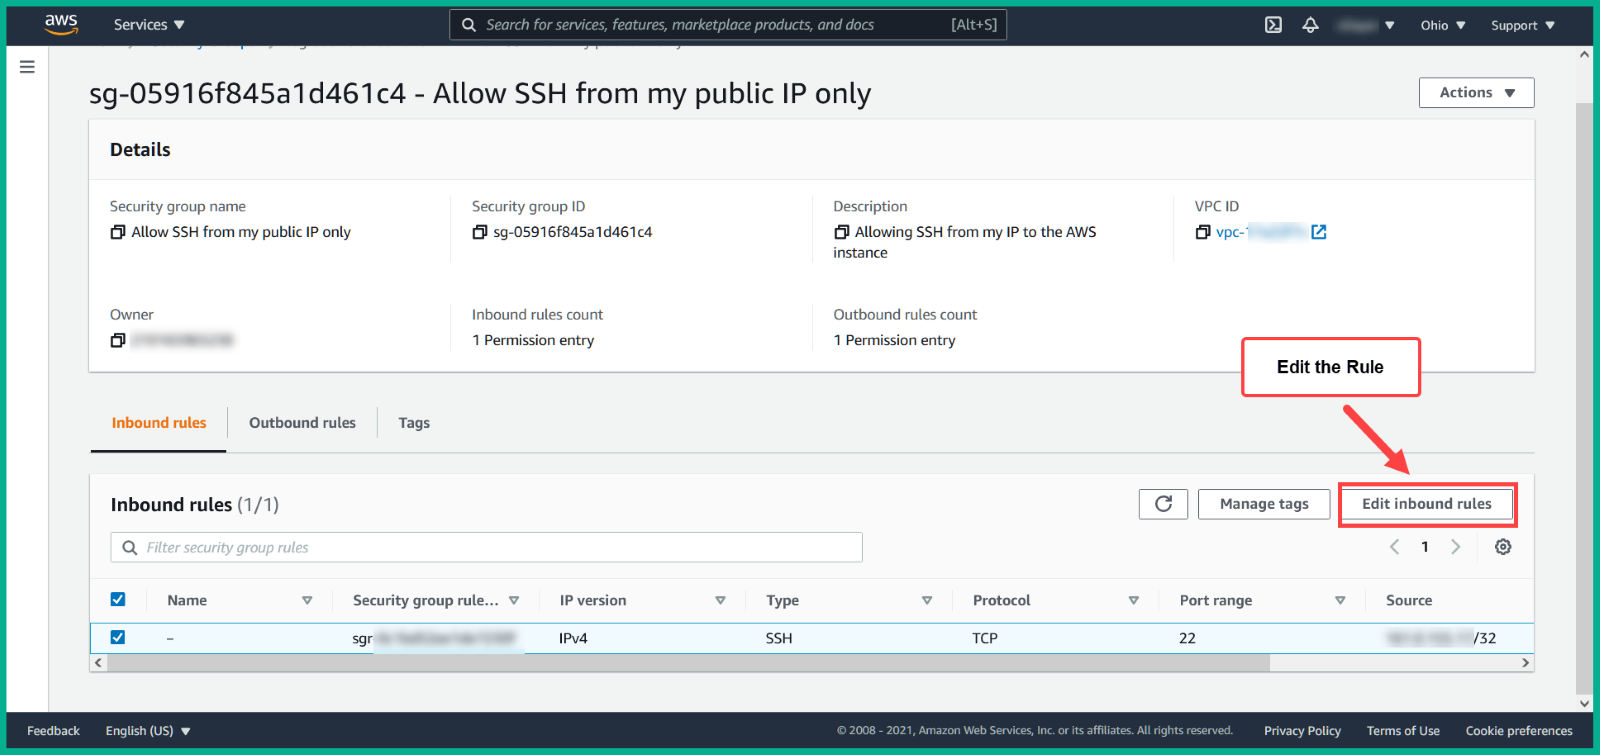
27. Adjust the security rules to the following requirements:
- Ensure you restrict TCP port 64294 to allow Admin access only from your source IP address.
- Ensure you restrict TCP port 64295 to allow SSH access only from your source IP address.
- Ensure you restrict TCP port 64297 to allow the web interface access only from your source IP address.
- Configure TCP ports 1 – 64000 on IPv4 and IPv6 to allow everything else from the internet.
The following snippet shows how the rules are to be configured and saved:

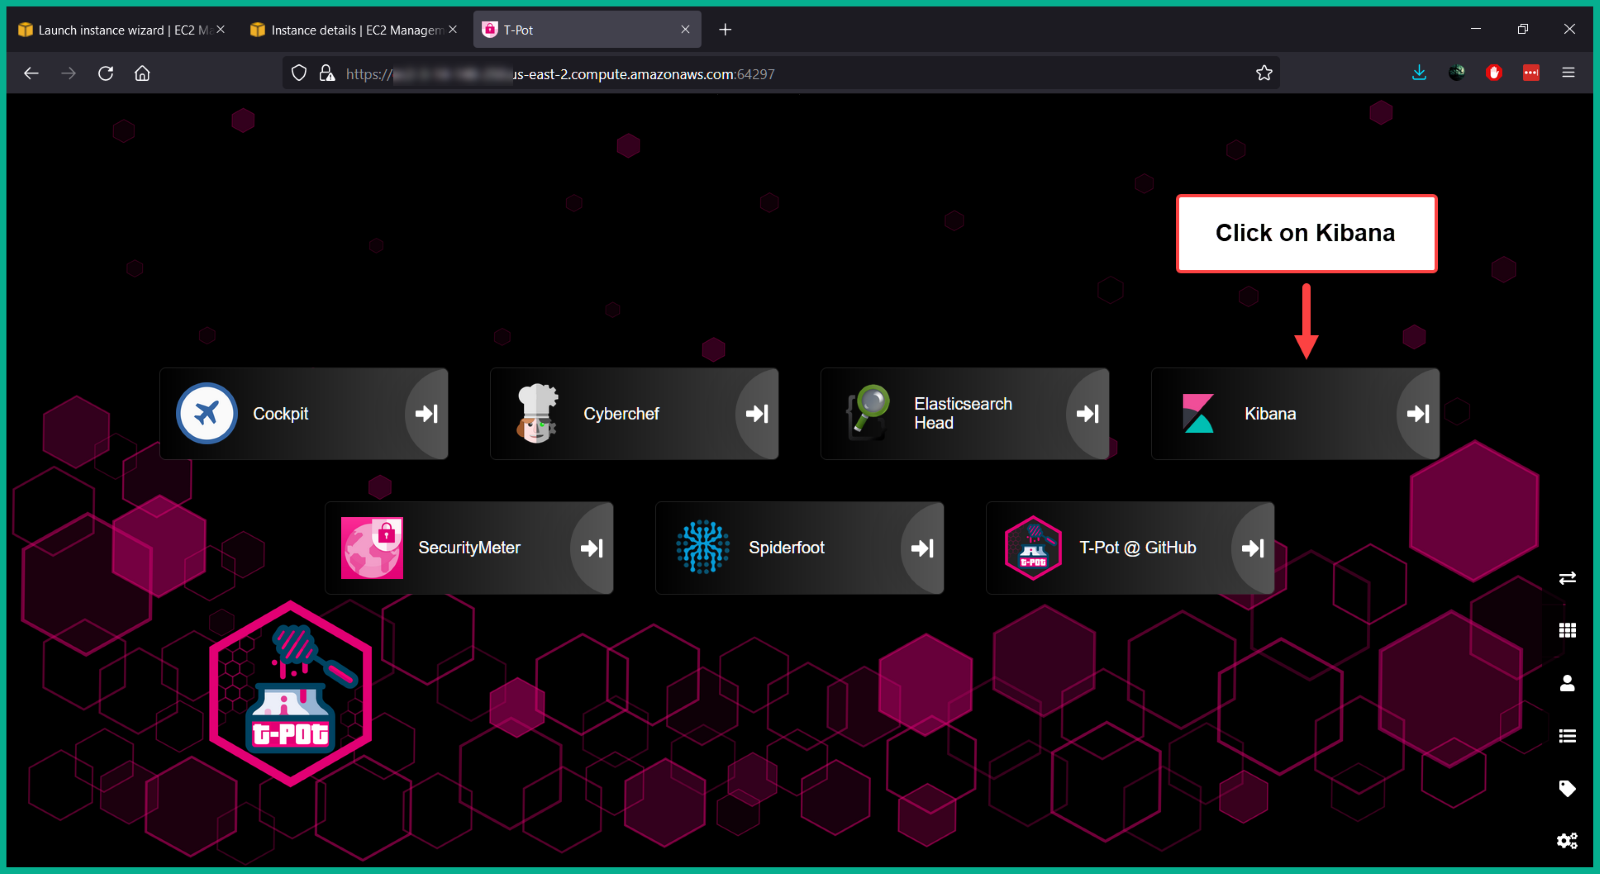
28. Next, open your web browser and go https://:64297 and log-in with the user account, you will be redirected to the following dashboard, simply click on Kibana:
29. Next, click on > T-Pot as shown below:
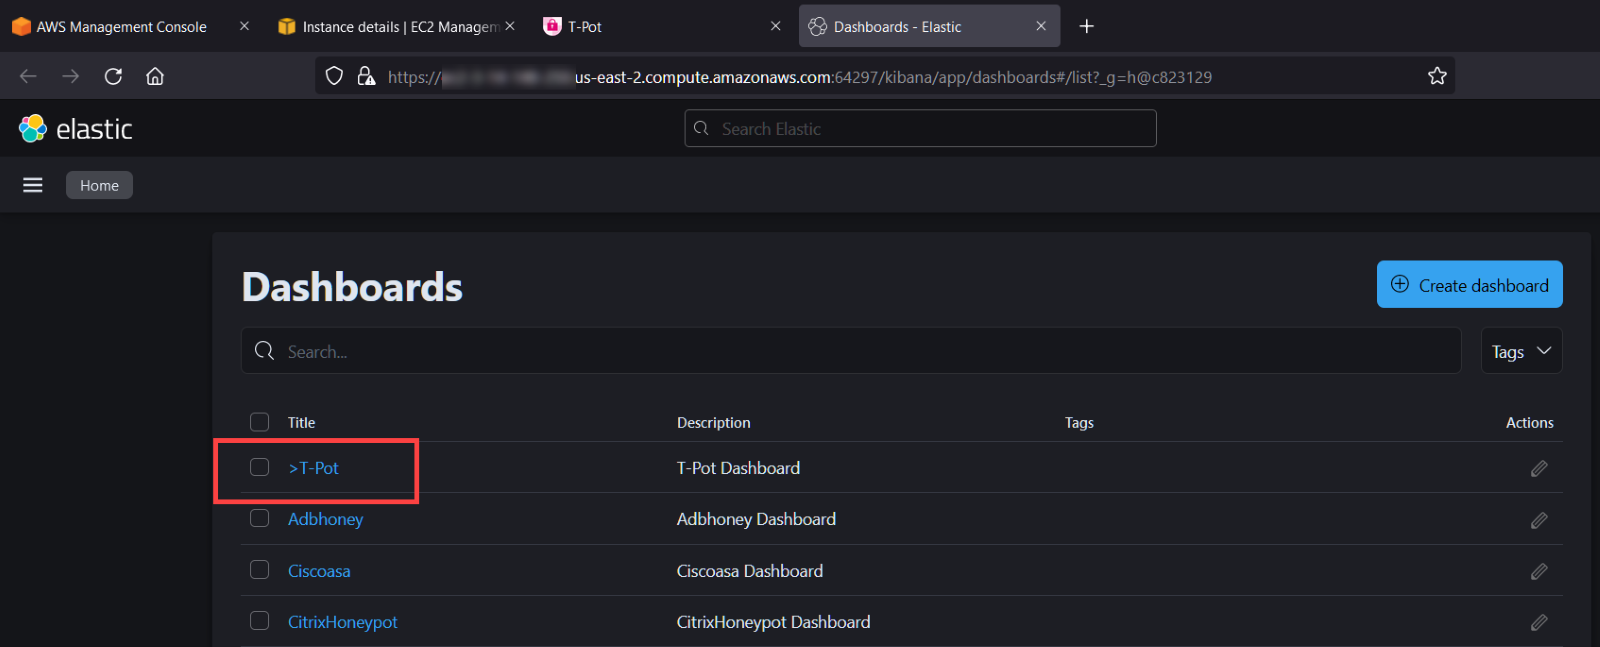
The following shows all the live threats and cyber-attacks which are detected by our honeypot:

The longer you leave the honeypot running on the internet, the more data it is going to gather and provide visual representation of the threats on the internet. Keep in mind, the virtual machine on AWS is being charged based on your usage. Therefore, if you are not using a service on AWS, you should stop or terminate it to reduce the charges to your credit card.


