
Setting up Automated Threat Response in Microsoft Defender for Cloud (Azure Security Center)
Written By: Mustafa Ahmed
What is Azure Security Center/Microsoft Defender for Cloud?
Microsoft Defender for Cloud (formerly known as Azure Security Center) is an important Azure service that ensures the security of cloud resources and workloads running in the cloud or on-premises. This service serves as a powerful Cloud Security Posture Management (CSPM) tool and Cloud Workload Protection Platform (CWPP) for not only Azure resources, but also multi-cloud and on-prem resources.
How does Defender for Cloud help in automating threat response?
As security teams receive numerous alerts every day, addressing each alert individually is not possible. To overcome this tedious task, Microsoft Defender for Cloud allows security professionals to use its workflow automation feature to automate workflows for incident response such as notifying stakeholders about security events, change management processes, and implementing certain remediation steps.
This feature triggers Logic Apps automatically based on security recommendations, alerts, and regulatory compliance changes to secure resources and workloads by taking appropriate actions (that are configured) or alerting security teams.
Steps to use Microsoft Defender for Cloud for automated threat response:
The first step is to create a logic app, connect it to an email and Microsoft Defender for Cloud, and specify the actions to be taken when the app is triggered. Next, we must create workflow automation, specify triggers, and connect it with the logic app.
Creating a Logic App
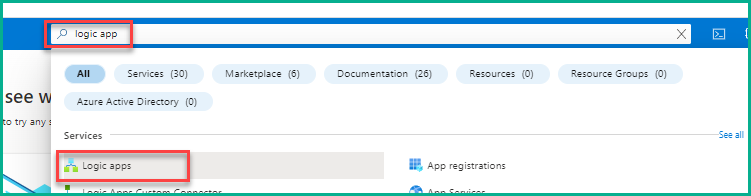
- Go to the Azure portal and log in to your Azure account.
- Type “logic app” in the search bar on the top, and then select Logic apps.
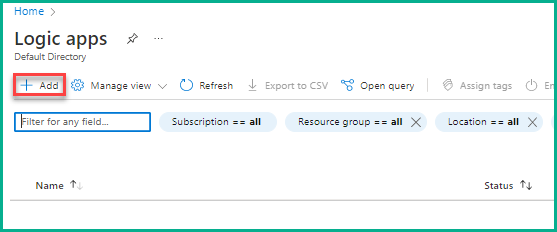
3.On the Logic apps page, click on Add to start creating a logic app.
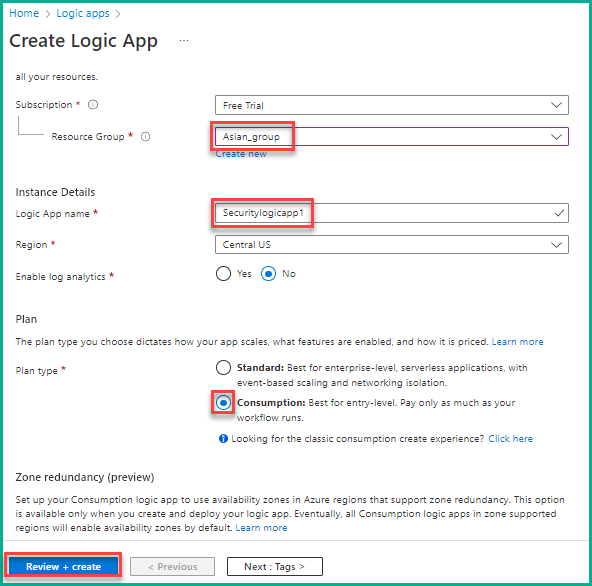
- On the Create Logic App pane, select a Resource Group, provide the name to the logic app, and select Plan type. You can create a new resource group if no group exists. Here, we are selecting Asian_group (an existing group) in Resource Group, naming the logic app as Securitylogicapp1, and selecting Consumption in Plan type, as shown in the below screenshot. Now, click Review + create to move ahead.
- Click Create on the summary page to complete the creation of the logic app. A message saying, “Deployment in progress” appears.
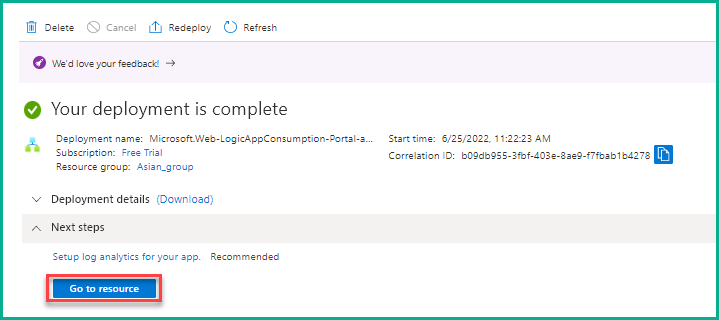
- After the successful deployment of the logic app, click Go to resource, as shown below.
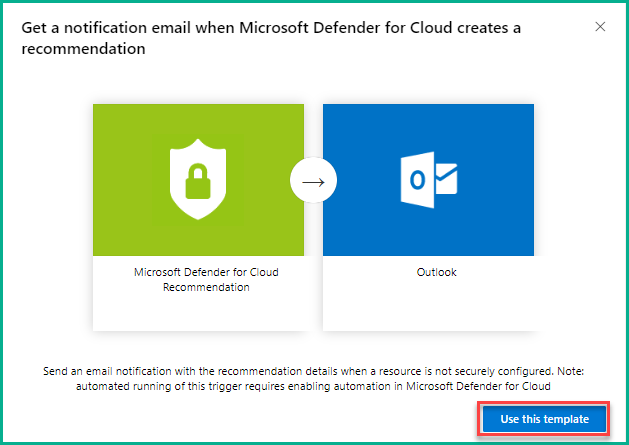
7. On the Logic Apps Designer page, choose Security for Category in the template section and select Get a notification email when Microsoft Defender for Cloud creates a recommendation. You can select any of the existing templates or create new templates apart from the one we selected here based on your requirements.

8. In the next window, click Use this template to select the template.
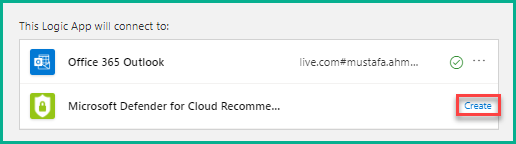
9. Connect your Office 365 email account to the logic app by clicking the + icon. After logging into your Office 365 account, the connection will be established and you will see a tick mark with your mail id, as shown below. Click Create against Microsoft Defender for Cloud to connect it to the logic app.
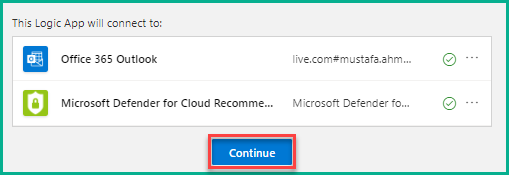
10. After it is connected, click Continue to move ahead.
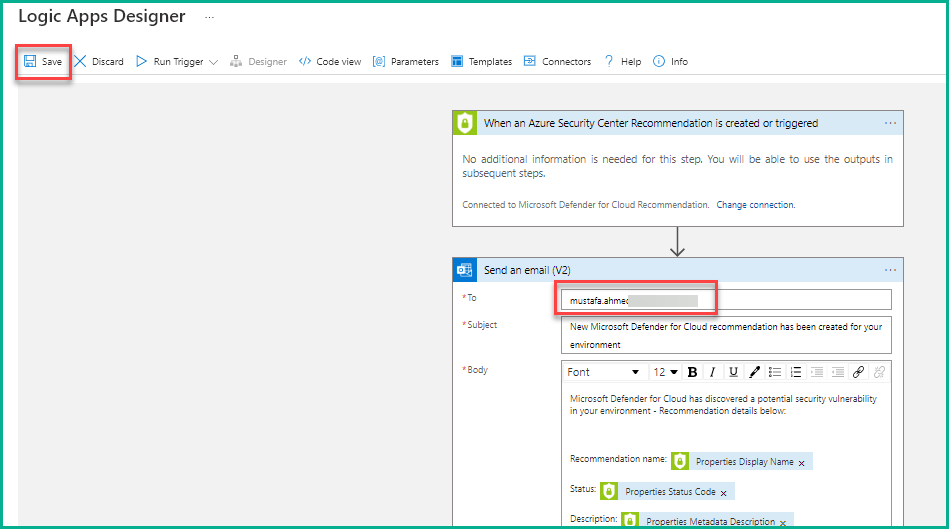
11.On the next page, a series of events is displayed that will be performed/triggered in the case when a recommendation is generated by Defender for Cloud. You can add multiple steps, but we are not adding additional steps here. In the Send an email pane, provide your email address where you want to be alerted and the remaining fields are pre-populated by the logic app. Now, click Save to finish creating the logic app.
Creating Workflow Automation
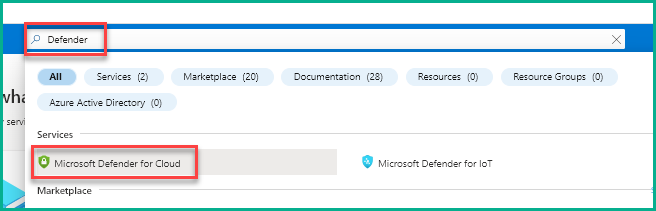
- Type “Defender” in the search bar on the dashboard and then click Microsoft Defender for Cloud.
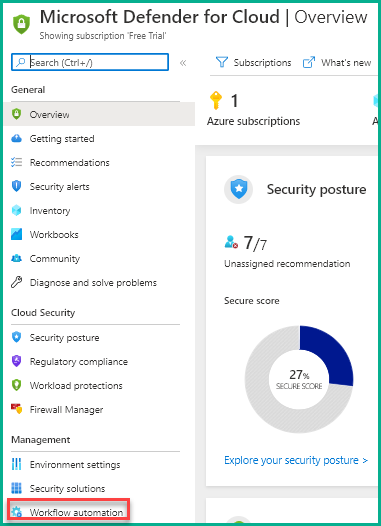
- Click Workflow automation on the Microsoft Defender for Cloud dashboard.
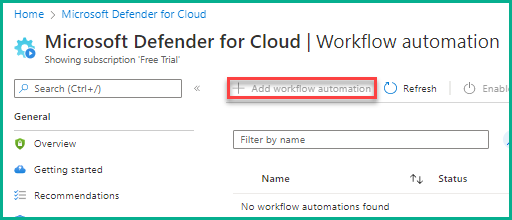
14. On the Workflow automation page, click Add workflow automation.
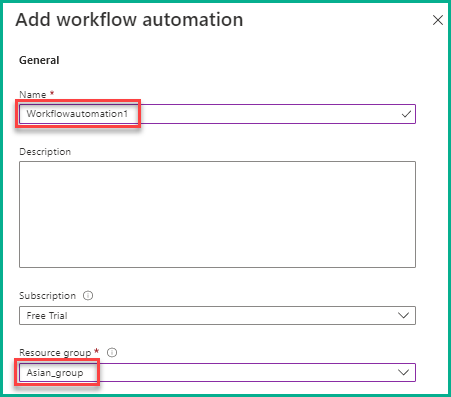
15. Under the General section in the Add workflow automation pane, provide the required details like Name, Subscription (if you have more than one), and Resource Group, as shown in the below screenshot. Here, you can select any name but select the same resource group used for the logic app.
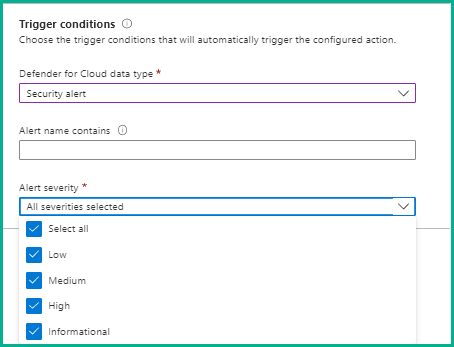
16. Under the Trigger conditions section, choose a suitable option for Defender for Cloud data type. There are three options: Security alert, Recommendation, and Regulatory compliance standards. Choose any one option you need and enter the required details. By default, Security alert and Alert severity are selected. We are not changing anything here and retaining what is selected by default.
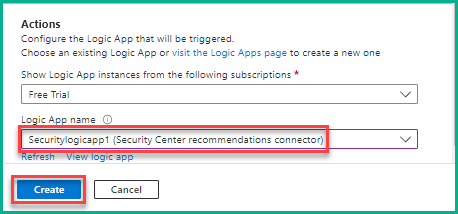
17. Under the Actions section, select the newly created logic app (Securitylogicapp1) and click Create. If the logic app is not visible, click the Refresh button and then select the app.
18.After successful creation, the workflow automation is enabled and active, as shown below.

This completes the setup of automated threat response in Defender for Cloud.
- You will get an email notification automatically whenever the workflow automation is triggered, based on the conditions we chose in the 16th step.
Using this workflow automation feature, security teams can save their valuable time and concentrate on things that are more important.


 )