
Written By: Austin Miller
Now we know how to approach threat modeling, it’s time to look at a tool that we can use. For this example, I’m going to run through the free Microsoft Threat Modeling tool. By exploring the full capabilities of the free tool, you can build deeper threat models and understand how the adversary will approach any potential vulnerabilities in your software.
Getting Started
Using the Microsoft Threat Modeling tool is quite easy, but you need to understand how to build models or use templates first. To get started on assessing the threats in your software (or any other software that you would like to run in your organization), you only need a few basic things for this tutorial:
- A machine running Windows.
- The free Microsoft Threat Modeling Tool which you can download here.
- If you are running a test on an existing piece of software, a .tb7 file that contains a map of the application you want to review.
For the purposes of this tutorial, I am using Windows 10.
Why Am I Doing This?
Threat modeling is the best way to find and address issues in your software in theory. By exploring the attack vectors and potential weaknesses in the system, you can create a fuller picture of how your software may be misused or exploited by the adversary.
Using the Microsoft Threat Modeling Tool
This tool is designed to be easy to use but it still offers a wide range of customization options at the same time. Because of that, the simple user interface (UI) can be a little difficult to navigate on your first time. But don’t worry – that’s why we’ve made this guide.
After you have installed and opened the application, you will find this screen:
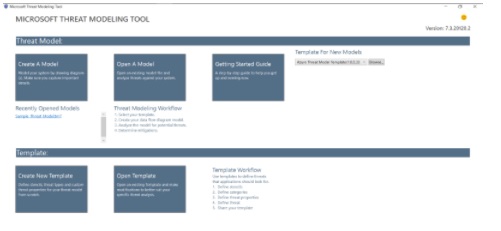
Fig: Microsoft threat modeling home screen
Although you can open an existing model file and assess someone else’s threat model for their software, we are going to click on Create A Model. There’s no better way to learn something than actually doing it!
You can also find existing or downloaded templates under the dropdown menu titled Template For New Models.
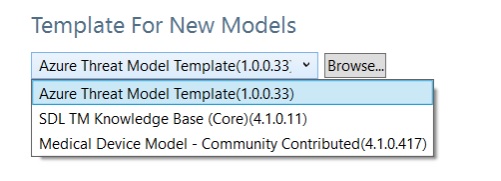
Fig: Template for New Models dropdown menu
Mapping the Application
You should now see a screen that looks like this:
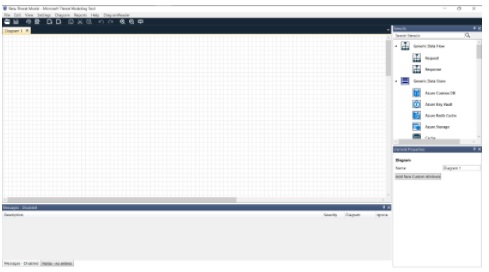
Fig: Microsoft Threat Modeling Tool Create a Model interface
We want to quickly build a simple web application. On the right-hand side of the interface, you will find the Stencils menu:
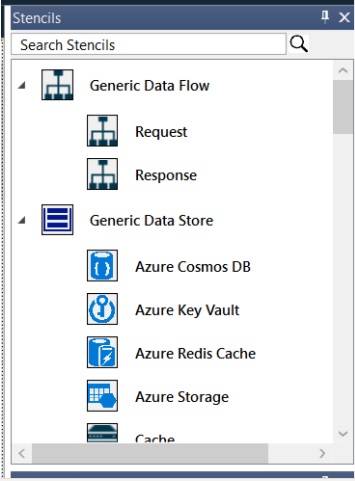
Fig: Microsoft Threat Modeling Tool Stencils menu
Using the Database, Browser, Web API, and Web Application stencils, I can create a very rudimentary diagram that could show simple request-response functionality. Remember: the idea here is not to develop a full technical document on an application but to assess the risks and potential vulnerabilities that are present in the system.
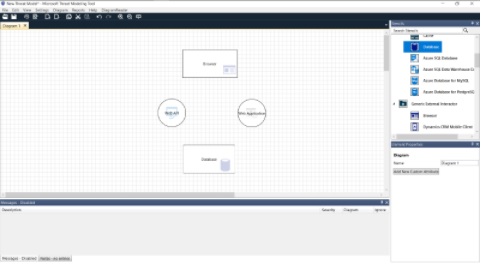
Fig: Microsoft Threat Modeling Tool with mock diagram of an application
And remember to include your request and response arrows as well as labeling in the diagram.
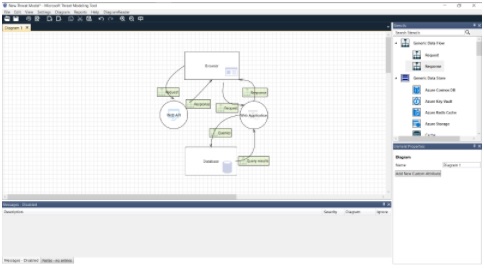
Fig: Microsoft Threat Modeling Tool with mock diagram of an application
Reports > Create Report
Austin, why is this any different from simply drawing an application map by hand?
Good question, reader. You’re right to wonder. But now we are going to explore the real genius of using threat modeling tools – generating vulnerability reports. On the toolbar, you will find Reports. In the dropdown menu, click on Create Full Report.
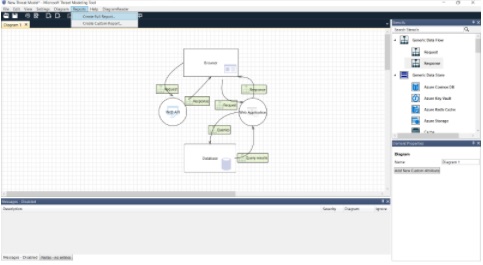
Fig: Microsoft Threat Modeling Tool with Reports > Create Full Report highlighted
As you grow accustomed to the Microsoft Threat Modeling tool, you can start to create custom reports and filter your findings to only feedback exactly the information you need.
When you click on Create Full Report, you will find the Generate Report window. Select or deselect options as appropriate and then click Generate Report.

Fig: Generate Report pop-up
And just like that, you’ve created your own threat modeling report!
Understanding the Report
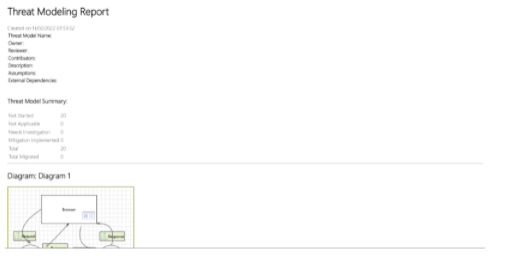
Fig: Threat Modeling Report
The report that the Microsoft Threat Modeling Tool creates is very simple to understand. Because we have literally just created a simple diagram, there are only Not Started threats included in our summary. As you work through the report and address issues within the software, these will be reassigned as appropriate.

Fig: Microsoft Threat Modeling Tool threat feedback
Thanks to threat modeling summary, we now have a full report that gives us a breakdown of all the issues our application will face. Using the generated summary, you can address all the prominent security issues in your application in order from high priority to low priority.
Included for each potential vulnerability found, you will receive the following information:
- Category
- Description
- Justification (if you are tolerating a vulnerability)
- Possible mitigation
- SDL phrase
- Priority
With this arsenal of information, you will be able to make quick plans to address your issues and revise your application and threat model. Consistent reviewing will both expand your understanding of the most common vulnerabilities that app developers face every day as well as help you to learn how to mitigate issues in the real world.


