
Wireshark is one of the best tools when it comes to the analysis of network packets. Wireshark is an open-source packet analysis tool that sniffs the targeted network and captures all network packets (packet captures) to help security analysts to review the traffic for any hidden suspicious activity.
While we may use many tools in our day-to-day lives, tools like Wireshark still remain the primary tool for traffic analysis. But why Wireshark is so special? Simply because many tools may have their specific purposes and limited capabilities, but Wireshark has extensive capabilities with constant development as well as the addition of new versions to extend the capabilities.
Wireshark helps network and security analysts to detect security anomalies, such as rogue hosts, abnormal port usage, and suspicious traffic. It helps in detecting and troubleshooting network problems, such as network failures, congestions, and even port scanning activities in the case of intrusion attacks
Some of the reasons why people use Wireshark.
- Multiple Platform support for both Windows and Linux with Command-line and GUI support
- Capture live packet data from all types of network interfaces.
- Capable of Opening files exported from other packet-capturing tools like tcp dump/Win Dump
- Wireshark captures shows extensive details like Network info, Protocol info, and Hex dumps for analysis
- Customized report capability for reporting
- Criteria-based search with custom filtering
Installation
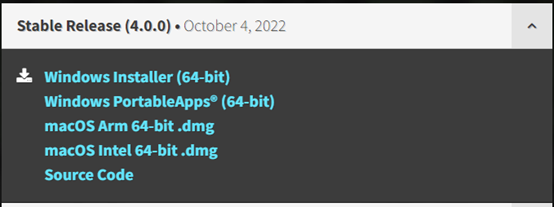
We can get the latest version of Wireshark as per the platform on the official website along with the documentation with all the steps. As per the website, 4.0 is the latest stable version available.
Wireshark Analysis
Wireshark GUI comes with the default view of recent files with a drop-down interface.
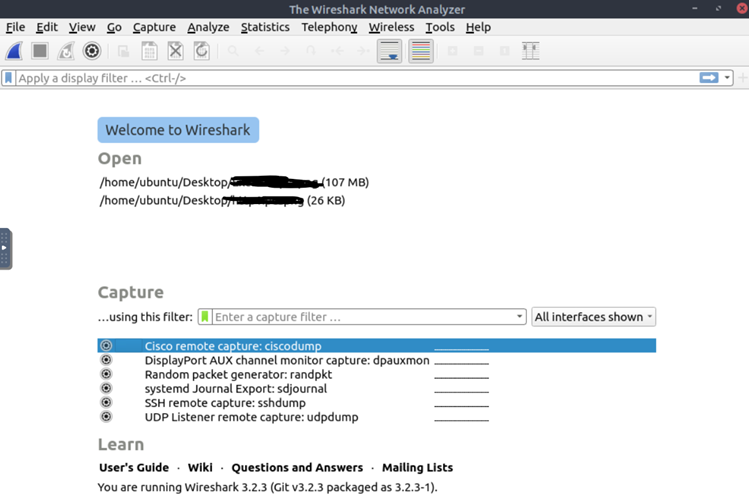
We can import already captured packets files stored in the format of packet captures (PCAP) by other tools like tcp dump and use Wireshark’s features for analysis.
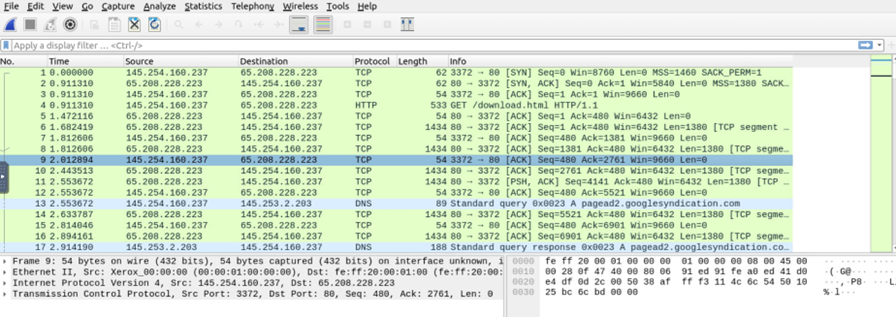
As per the default settings, we can see the time, source, Destination IP Addresses, Protocol used by the traffic, length of the packet, Additional Infor, and description. We can change the settings in the preferences tab.
When we start selecting Individual packets, we are able to see more additional Information of that specific packet which can provide us with more data for our analysis. See the SecPro newsletter for an illustrated example of the information available to us.
In this scenario, we are going to analyze a PCAP file containing some random web traffic. We have selected a packet to see what all details it provides
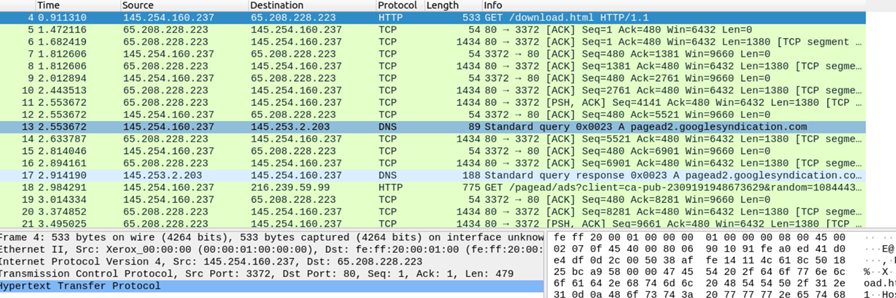
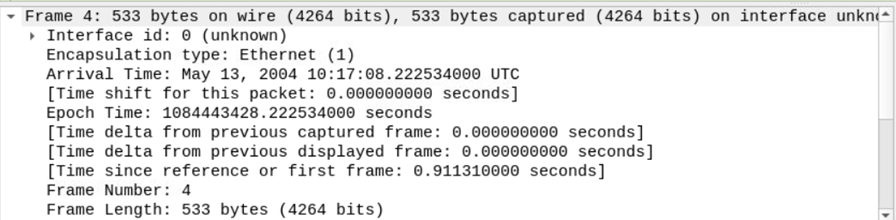
1. Frame
This indicates the details of the packet transferred physically across the network frame/packet that you are looking at and details specific to the Physical layer of the OSI model.
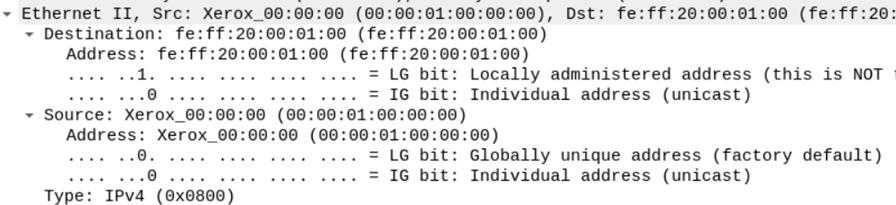
2. Ethernet II
Captured Interface showing the source and destination device addresses.
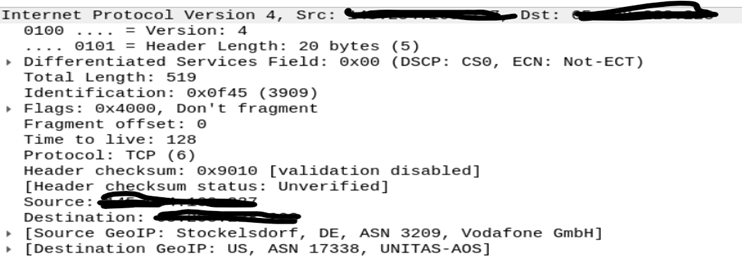
3. Internet Protocol
This will show you the source and destination IPv4/IPv6 Addresses.
4. Transmission Layer Protocol
This will show you details of the protocol used (UDP/TCP) and source and destination ports.

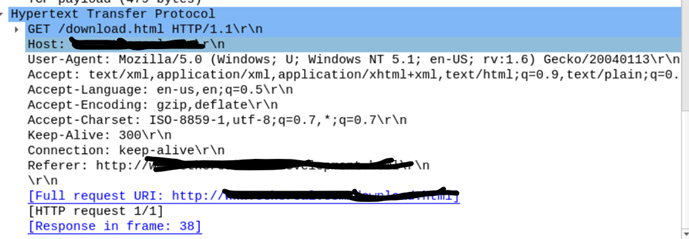
5. HyperText Transfer Protocol
It shows the Protocol used in a transfer like HTTP, HTTPS, FTP, SMB, and so on, along with the data like the Destination Address in this case.
The Wireshark Interface is integrated with various features to help the analysts to drill down while investigation. Once a real-time capture or import of PCAP file is completed, Analysts should:
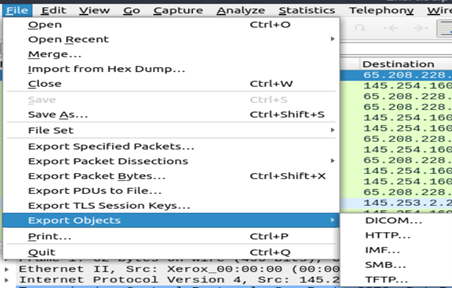
- Go to File Tab to see multiple ways of extracting packet information as per requirement and further analysis. This includes, Packet data export, Object export and keys.
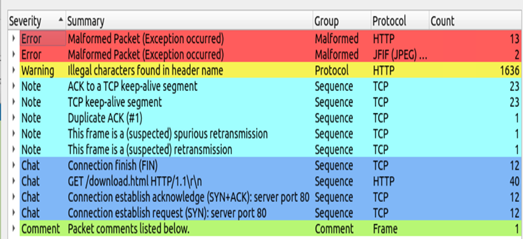
Go to the tab Analyze for expert information helps to identify the overall summary of the PCAP file with details of Anomaly, malicious files and their details.
Packet Filters
Wireshark has a powerful filter search engine which helps analysts to drill down the captured packets in a customized way . There are two types: capture and display filters. Capture filters are used for “capturing” only the packets valid for the used filter. Display filters are used for “viewing” the packets valid for the used filter.
- Capture Filters are the ones used to filter packets to view from particular source, port, interface.
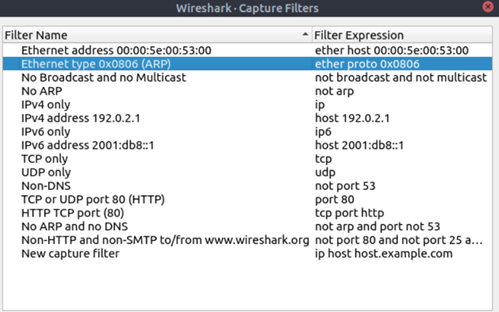
Display Filters are the ones which filter out the captured packets as per the query.

Additional Filters
Wireshark allows you to select a specific element as a filter like [IP, Port, protocol] or a bunch of packets which are captured as a stream of communication packets. This can help analysts to view the entire stream of capture.
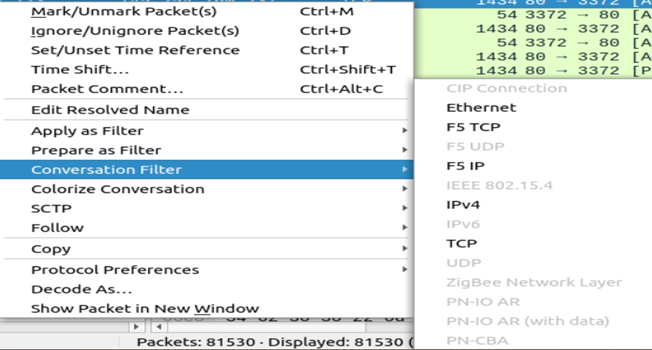
- Conversation Filter
Once you select the packet, Right-click on packet and select conversation filter along with options like Interface, protocol, port and type etc. This will give you list of packets in the communication.
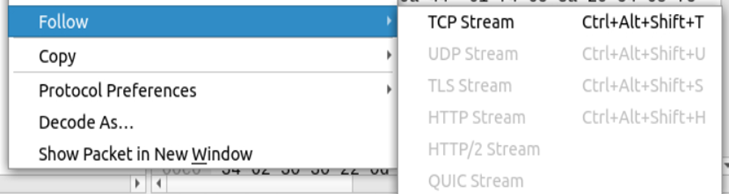
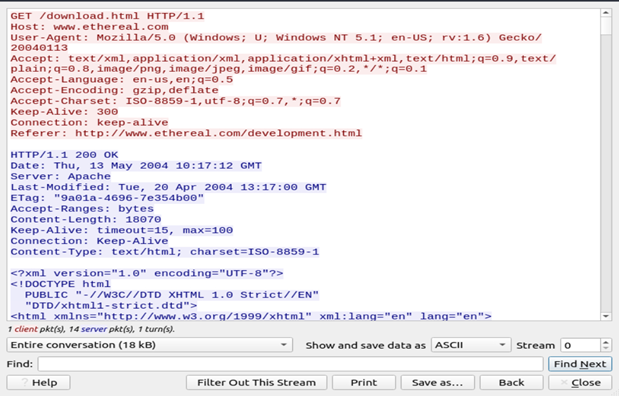
- Follow Stream
A similar feature, but shows all the communication at once place in a separate dialogue box with search bar.
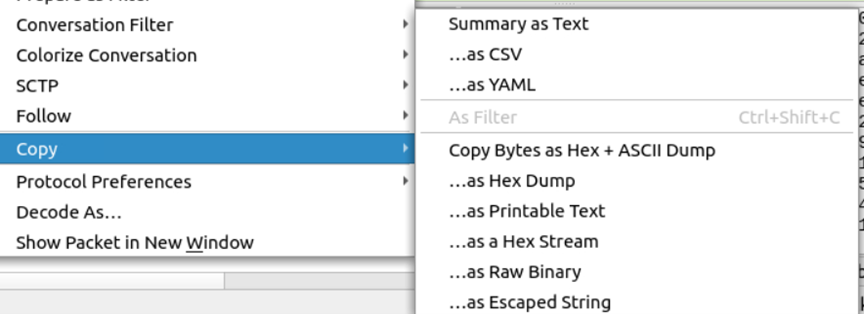
- Packet Copy
Once you select a packet and Right-Click on it, you will see Copy option with subset of options of copy the packet information externally. Sometimes packets contain more information which is not comfortable for an analyst to view in the tool. Hence Analyst can copy specific information like Packet Information, ASCII value, Hex Dump etc for further analysis or export the packet information in form of Text, CSV or YAML. Exporting in YAML helps analysts to create scripts and configurations
There are many other options provided in the wireshark which can used for analysts while doing investigation. This will be covered next week, so don’t forget to keep an eye open for the next issue of the secpro!


