
Our previous articles discussed the forensic process on different platforms, but if you read them, you will find one specific tool used to extract the data. In this article, we will discuss that tool which is Autopsy.
Autopsy is a tool that is used industry-wide tool for digital forensics. The best feature is that it is open source and developed by the US Dept of Homeland Security.
It is fast, easy to use, and capable of analyzing all types of mobile devices and digital media. Its plug-in architecture enables extensibility from community-developed or custom-built modules. Currently, Autopsy is used in every industry by every professional who seeks help for recovering data.
Basic Structure
Autopsy manages all the data like an investigation. It will create a new project called case for all the investigation and it helps to save the process in a timely manner. We can create cases, export and import cases in a format supported by Autopsy(.aut)
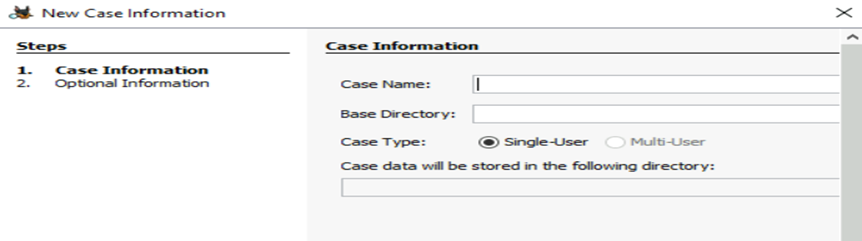
When you open a new case, you will create records like Case Name, Base Directory, and Case Type if the data need to be shared with multiple users.
Once we create it we need to start scanning the data sources, we can do it by clicking “Add Data Source”. This will show what type of data you need to scan.
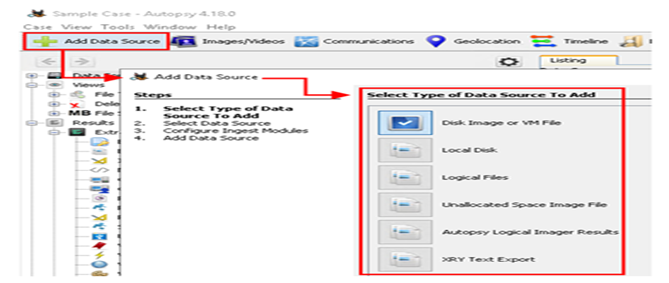
It’s a multi-step process. Once the data source is selected, we need to configure additional add-ons/plugins called Ingests
Each Ingest Module is designed to analyze and retrieve specific data from the drive. You can configure Autopsy to run specific modules during the data source stage or later by choosing the target data source available on the dashboard.
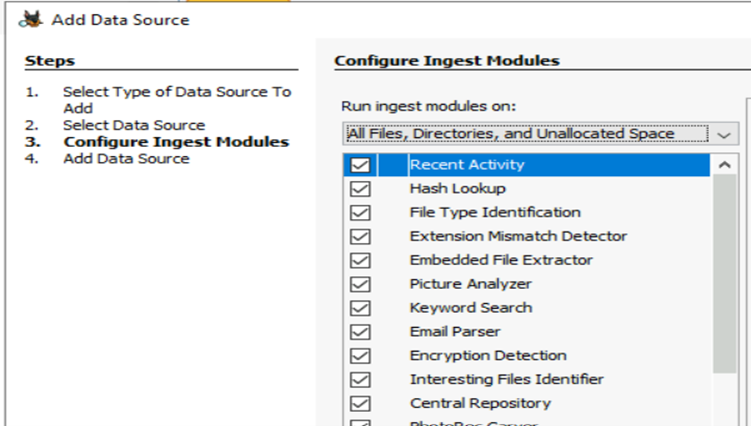
It will take some time to process the data as it scans a large set for required information. If you see in the above image, there are different categories like Encryption Detection, Interesting File Idenfitier and other ingests help you to segregate data accordingly for future use.
P.S : Some Ingest Modules have per-run settings and some do not. For example, the Keyword Search Ingest Module does not have per-run settings. While the Interesting Files Finder Ingest Module have them and these are represented by a yellow triangle icon.
Main Menu
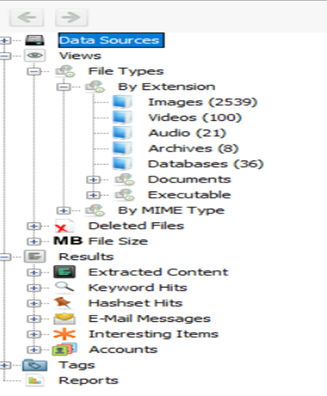
The main user interface consists of multiple tree type structure started from 5 basic nodes
- Data Sources
- Views
- Results
- Tags
- Reports
Let’s pick each one to understand Better
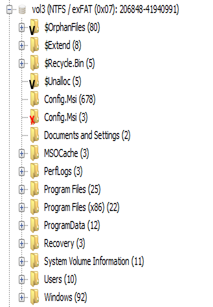
- Data Source : This node contains all the data sources from which the data is collected. It can be Disks, Logical Files, Registry data and other data sources
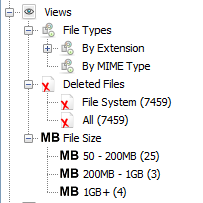
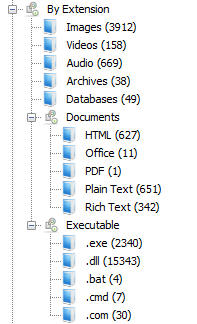
- View : This node contains the details of files the scanner identified and the category like file types, extensions it have before extraction of raw information
- Results : Results are the output of configured ingests to sort the data according to the required information. So in this node we will see key information
- Tags : Tags are generally used if we have any data to be tagged with certain tags for future reference.
- Reports : Used for creating reports
Every node has expand mode to drill down the data like data sources, volumes, file sizes, extensions.
Once you select any data, you can see more details in the right side panel with more information about the file you selected.
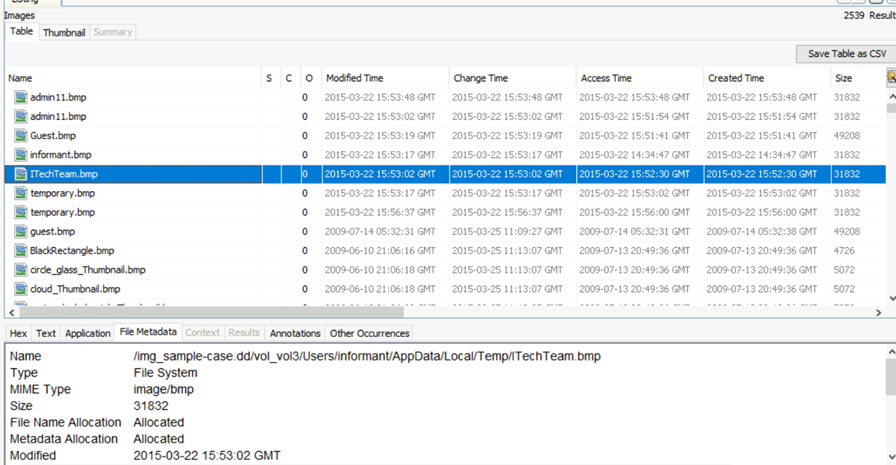
Once you select any sub node, all the information belong to the subnode will be visible here. Along with file size, type, created time etc. you have 3 more fields S, C, O
S = Score, The Score will show a ! point for a folder/file marked/tagged as notable and a yellow triangle ▽ pointing downward for a folder/file marked/tagged as suspicious.
C = Comment, If a yellow page/ note icon is visible in the Comment column, it will indicate that there is a comment for the folder/file.
O = Occurrence, this column will indicate how many times this file/folder has been seen in past cases. You can see value 0 in this case.

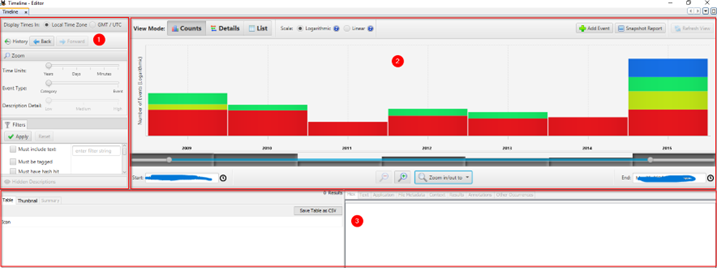
Header Bar contains some more important options which can used for analysis like Mapping Geolocation, Identifying the timeline of events, Searching keywords etc. Below is one of example of these options
Once of the important among these options is the Generate Report, which helps to create a summary report from the scanned data source.
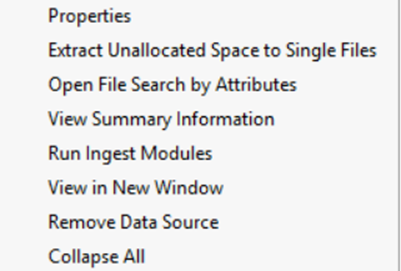
When you Right click on the data source, it gives you an option to create a summary information from which you can generate your own summary report.
Autopsy provide you the feasibility to generate report in multiple forms.
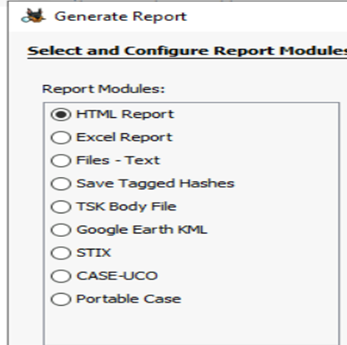

Once the generation is completed, you can download it on you local disk. This is an extensive standard report which can be used as documented evidence as it covers every detail of the scanned information
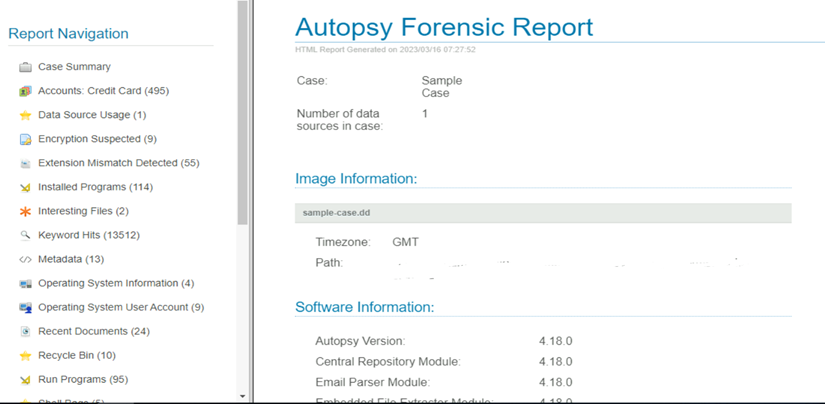
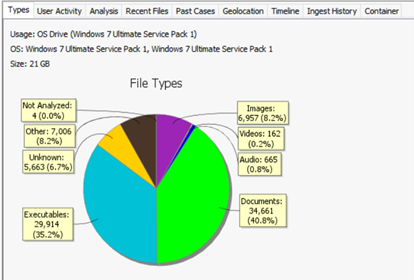
You can select the information you want to view by clicking the side navigation bar for details lie OS information, File details, file types etc.
There is a lot we can drill down to extract interested information using Autopsy. In many occasions there are chances that drives you are scanning contains encrypted information which can also be analyzed using autopsy.
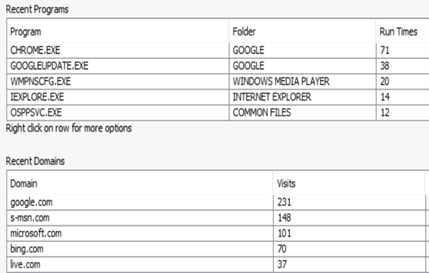
Critical information like User activity, keystroke information, program information and many more information can be used for forensic analysis to identify the root cause of the incident.


