
Brute-Forcing Full Drive Encryption
Post Credit: Karl Gilbert
Full Disk Encryption (FDE) is the encryption of all data on a hard drive device using an encryption key. Once a drive is encrypted, all data is automatically encrypted before writing it to the disk and all read operations automatically decrypt data before returning it to the system. Full disk encryption encrypts the entire hard drive including partitions like swap files, system files, and hibernation files. If an encrypted hard drive is compromised, the encryption of the drive remains unchanged, and only an authorized user can access it.
There are several attacks on FDE systems, which are commonly used in forensic activities. Here we are going to look into the brute-forcing methodology of attacking fully encrypted drives for both Windows and Linux systems.
Brute Forcing BitLocker
BitLocker Drive Encryption is an FDE feature that is built into the Windows OS and is used to address data theft and exposure scenarios. BitLocker provides the best protection when it is used in conjunction with a Trusted Platform Module (TPM). TPM is a hardware component installed in many new computers and it works alongside BitLocker to protect data and to ensure that the system has not been tampered with while it was offline.
In the first part of this tutorial, we will look at brute-forcing BitLocker full drive encryption:
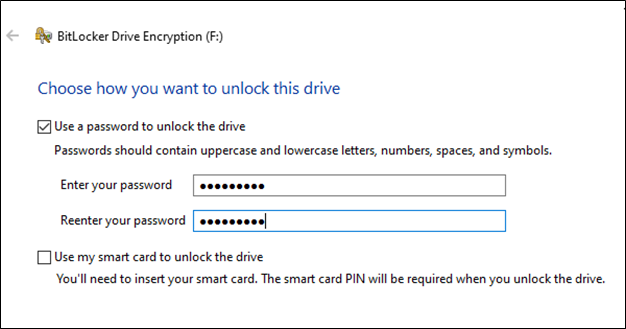
1- Let’s create a BitLocker-protected drive with an easy-to-guess password for our brute force demon. Here we have a drive F: where we are implementing BitLocker:
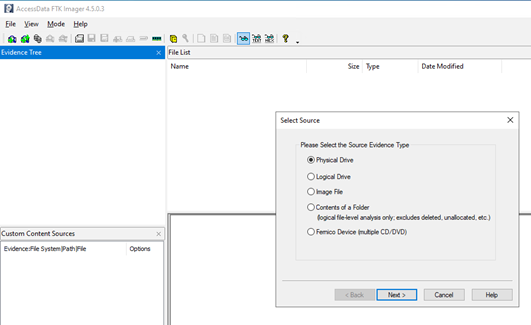
2- Next, we will be creating a Disk image of our BitLocker drive using the FTK Imager. If we’re performing forensics tasks or trying to recover a lost encrypted drive, this is typically the step at which we would start.
This tool is used for mostly forensics investigation but is useful to us to create the drive image. Start with the File -> Create disk option and select Physical Drive.
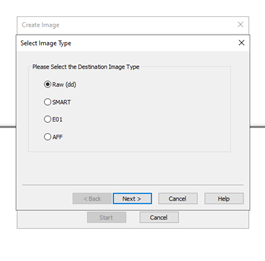
3- In the next screen, we choose our encrypted drive to create the image out of, here it would be PYSICALDRIVE2 in this tutorial. We need to keep the image type at Raw (dd) to make it easier for us to brute force the image.
4- Save the image file in another drive with more space than the BitLocker protected drive, as this is going to take an entire disk image. We are giving it the name “diskimage.image”. Once the image has been created, we can go ahead with the brute-forcing task.
5- Now it’s time to extract the hash from the disk image. To do that, we run a tool called “bitlocker2john” which is part of the “John the Ripper (JTR)” suite, on the disk image to retrieve the hashes. These hashes are useful for the purpose of recovering the password used to encrypt the drive. To do this, run the command:
bitlocker2john.exe -i G:\diskimage.image.001
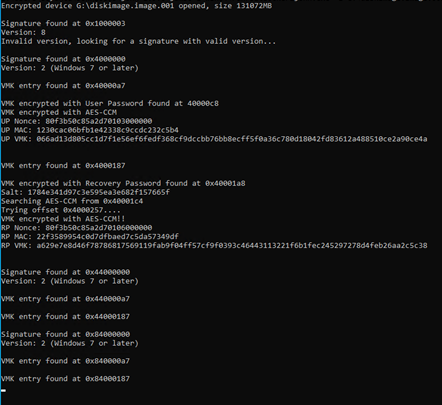
Once the hashes are recovered, they are thrown by JTR on the screen. We will be brute-forcing the User Password Hash to get the BitLocker password for the drive. For that purpose, we copy the User Password Hash string and store it in a txt file called “hash.txt” for the next step.
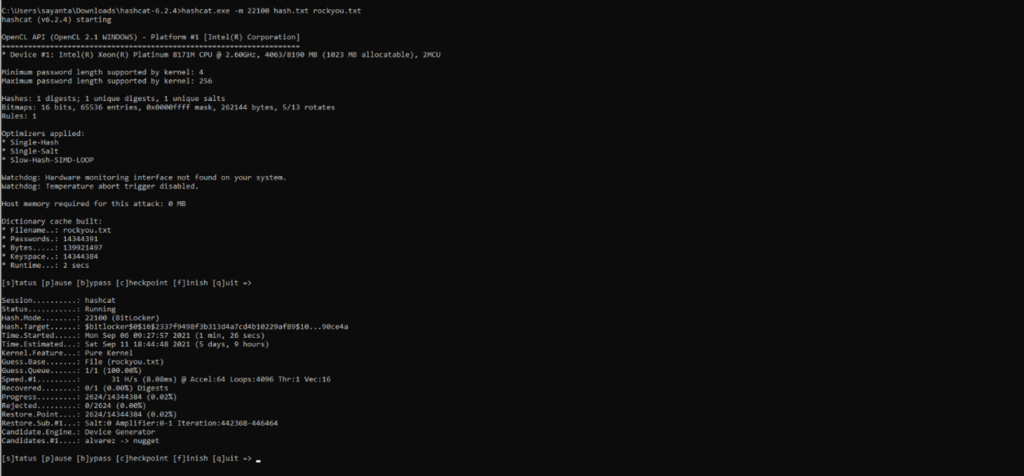
6- We will save the hash in a txt file and then use a tool called Hashcat to brute force. Hashcat is a tool that uses the power of a GPU to brute-force hashes, making it extremely fast and efficient. For the purpose of today’s exercise, we will be using Hashcat and a wordlist of passwords called rockyou.txt, which is easily available online. Wordlists are lists of strings that are commonly used as passwords. They can be used to speed up the process of brute-forcing by using a form of attack called a Dictionary Attack.The alternative to using a list of passwords in a wordlist is to do a full brute-force, which is more time-consuming but tries all permutations of alphabets and numbers. To start the dictionary attack, use the following command:
hashcat.exe -m 22100 hash.txt rockyou.txt
-m = hash method (22100 for BitLocker)
rockyou.txt = dictionary
7- We get our password in plaintext once brute-forcing is complete:
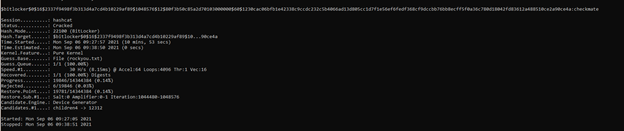
Thus, we have successfully defeated Full Drive Encryption on Windows.
Brute Forcing Linux Full Disk Encryption (LUKS)
For the second exercise, we focus on LUKS which is the default mode of encryption of drives on Linux. LUKS stands for Linux Unified Key Setup. However, like BitLocker and most encryption techniques, even it is vulnerable to brute-forcing attacks. Let’s look at how we can brute-force a LUKS encrypted drive:
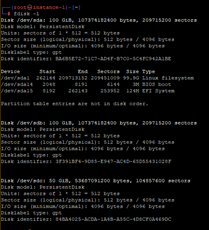
1- This is what initially our hard disks look like. We have a target hard disk which is about 50GB (/dev/sdb) and a backup disk (/dev/sdc) which we will be using to create an image of the LUKS partition:
2- We extract the headers of the LUKS encrypted partition using the cryptsetup command. These headers would be useful to run our brute-forcing script:
cryptsetup luksHeaderBackup --header-backup-file ~/LUKS_file /dev/sdc
3- Next, we create a simple python script that is going to brute force the headers with the list of words provided. For the demonstration, we have a limited set of words to make the brute force easy, however, this could be extended to include an entire wordlist.
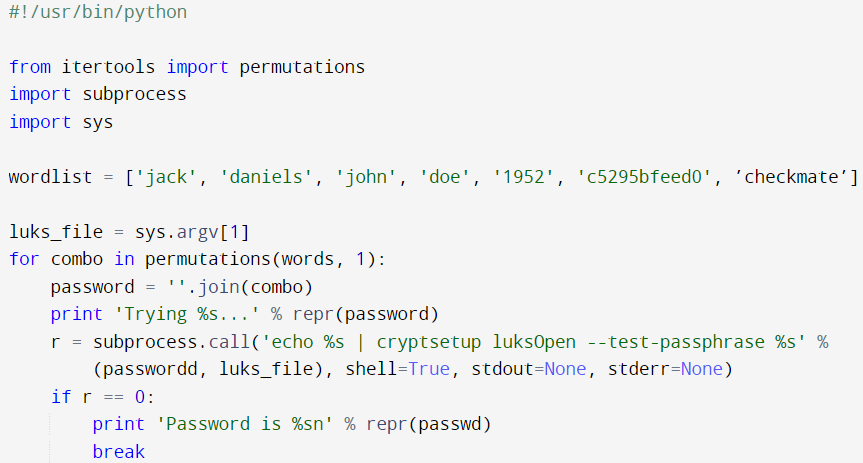
We can now run this script:
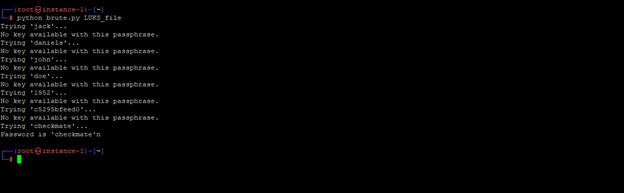
python script.py LUKS_file
4- We can see the script identifies the passphrase for us and prints it:
We can also use hashcat to execute the same attack using rockyou.txt as we did for BitLocker. So, to do that, we continue after Step 1, where we create an image of the encrypted drive using FTK Imager, similar to the first exercise. Post that, execute a hashcat dictionary attack against the LUKS Image using the following command:
./hashcat64.bin -m 14600 -a 0 LUKS_Partition.img rockyou.txt -o luks_password.txt

-m = hash method - 14600 for LUK encryption

-a = Crack method - 0 for standard dictionary (3 for bruteforce)

LUKS_Partition.img = Encrypted partition image

rockyou.txt = dictionary

-o = output luks_password.txt
The SecPro is a weekly security newsletter to help you stay sharp and upgrade your skills with trending threat insights, practical tutorials, hands-on labs, and useful resources. Build skills in as little as 10 minutes. Join the newsletter here.


